Getting Started
Creating a Configuration
Before you can communicate with the motor, servo and sensors that are connected to the Control Hub or Expansion Hub, you first must create a configuration file on your Robot Controller, so that the Robot Controller will know what hardware is available on the Control Hub’s or Expansion Hub’s external ports.
Getting the Control Hub Ready
If you are using a Control Hub, you do not need to make any additional connections. You simply need to make sure that the Control Hub is powered on and paired to the DRIVER STATION.
Connecting an Android Smartphone to an Expansion Hub
If you are using an Android smartphone as a Robot Controller, you must physically connect the Robot Controller smartphone to the Expansion Hub using a USB cable and an On-The-Go (OTG) adapter. Also, you should verify that the DRIVER STATION is currently paired to the Robot Controller.
Connecting an Android Smartphone to an Expansion Hub Instructions
Power on the Expansion Hub by turning on the power switch.
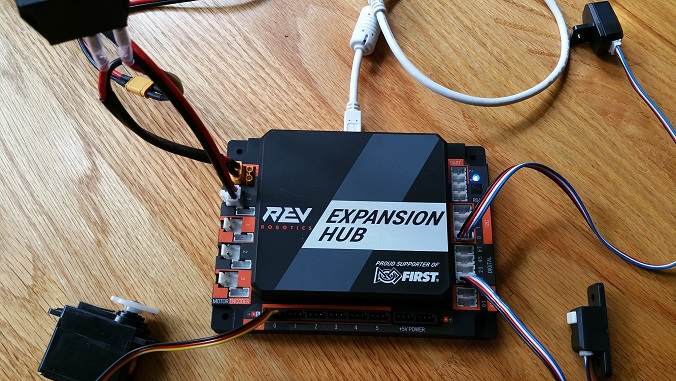
2. Plug the Type B Mini end of the USB cable into the USB mini port on the Expansion Hub.
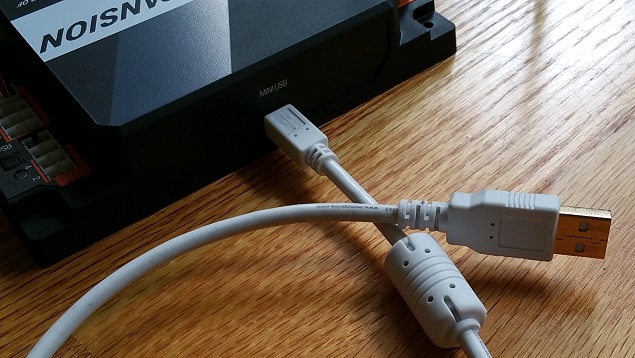
Plug the Type A end of the USB cable into the OTG adapter.
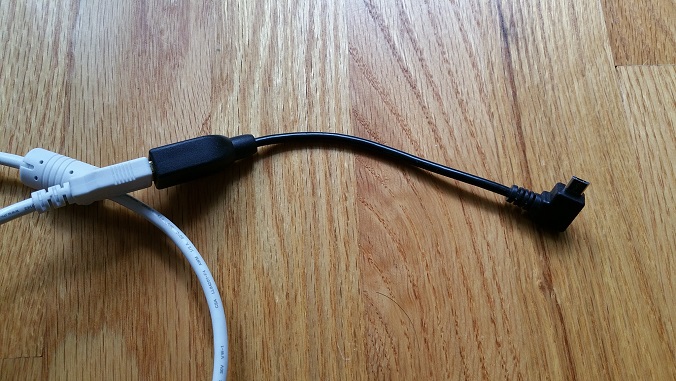
4. Verify that your Robot Controller smartphone is powered on and unlocked. Plug in the USB Micro OTG adapter into the OTG port of the Robot Controller phone.
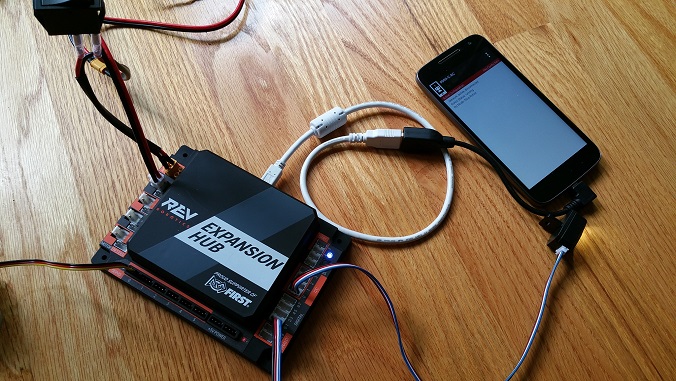
Note that when the OTG adapter is plugged into the smartphone, the phone will detect the presence of the Expansion Hub and launch the Robot Controller app.
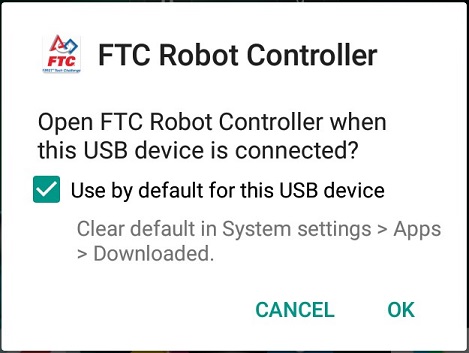
5. The first time you connect the Robot Controller smartphone to the Expansion Hub, the Android operating system should prompt you to ask if it is OK to associate the newly detected USB device (which is the Expansion Hub) with the Robot Controller app.
Important
You might be prompted multiple times to associate the USB hardware with the Robot Controller. Whenever you are prompted by your phone with this message, you should always select the “Use by default for this USB device” option and hit the “OK” button to associate the USB device with the Robot Controller app. If you fail to make this association, then the Robot Controller app might not reliably connect to this Expansion Hub the next time you turn your system on.
Creating a Configuration File Using the DRIVER STATION
Although the configuration file needs to reside on the Robot Controller, for this tutorial we will use the DRIVER STATION app to create the configuration file remotely. The DRIVER STATION can be used to create a configuration file for a Control Hub or for an Android smartphone Robot Controller.
Creating a Configuration File on the Robot Controller using the DRIVER STATION Instructions
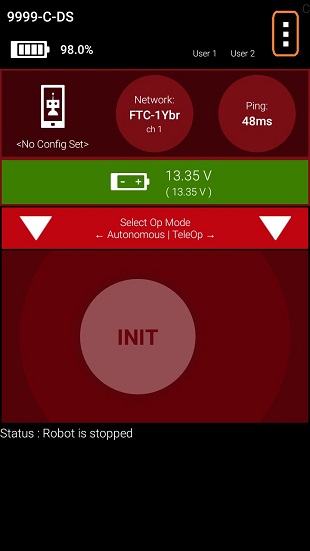
1. Touch the three vertical dots in the upper right hand corner of the Driver Station app. This will launch a pop-up menu.
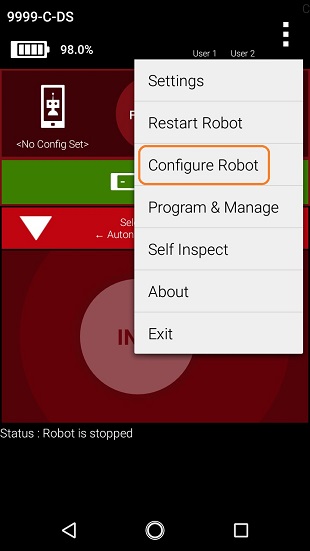
2. Select Configure Robot from the pop up menu to display the Configuration screen.
3. If your Robot Controller does not have any existing configuration files, the screen will display a message indicating that you need to create a file before proceeding.
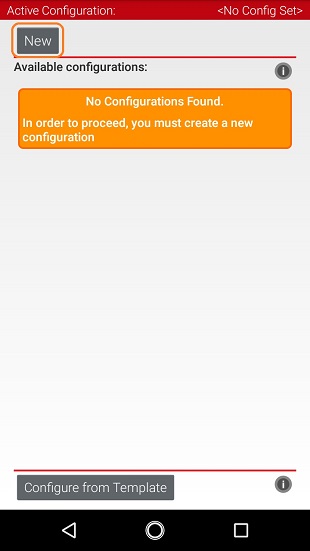
Hit the New button to create a new configuration file for your Robot Controller.
4. When the new configuration screen appears, the Robot Controller app will do a scan of the serial bus to see what devices are connected to the Robot Controller.
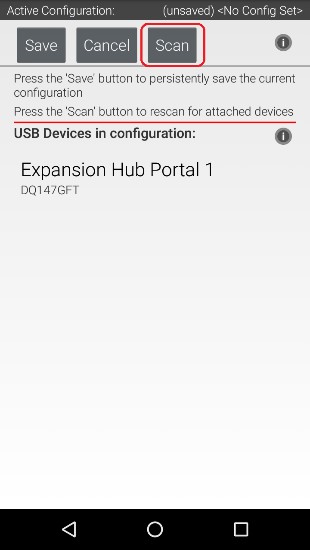
It will display the devices that it found in a list underneath the words “USB Devices in configuration.” You should see an entry that says something like “Expansion Hub Portal 1” in the list.
Your Expansion Hub is listed as a Portal because it is directly connected to the Robot Controller phone through the USB cable or in the case of the Control Hub through the internal serial bus.
If you do not see your Expansion Hub Portal listed and you are using a smartphone as a Robot Controller, check the wired connections to make sure they are secure and then press the Scan button one or two times more to see if the smartphone detects the device on a re-scan of the USB bus.
5. Touch the Portal listing (“Expansion Hub Portal 1” in this example) to display what Expansion Hubs are connected through this Portal.
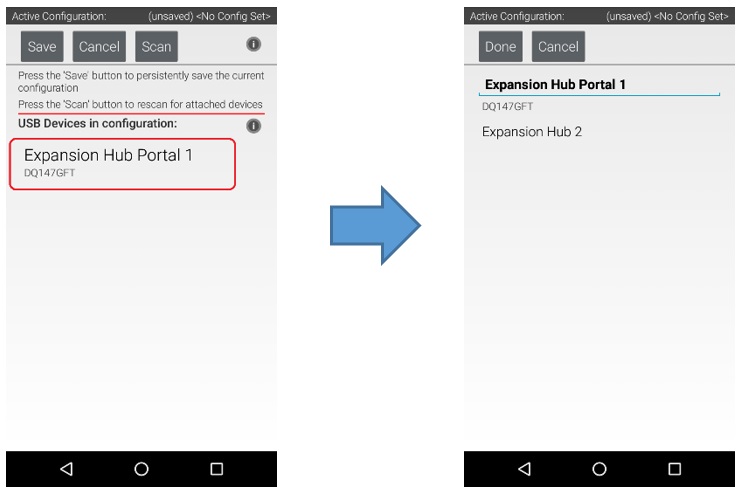
Since we only have a single Expansion Hub connected, we should only see a single Expansion Hub configured (“Expansion Hub 2” in this example).
6. Touch the Expansion Hub listing (“Expansion Hub 2” in this example) to display the Input/Output ports for that device.
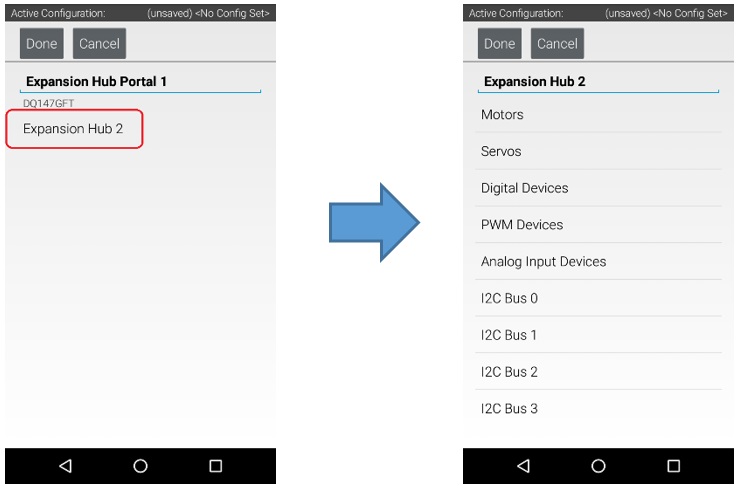
The screen should change and list all the motor, servo and sensor ports that are available on the selected Expansion Hub.