Configuring a Servo
You will also want to add a servo to the configuration file. In this example, you are using a standard 180-degree servo.
Configuring a Servo Instructions
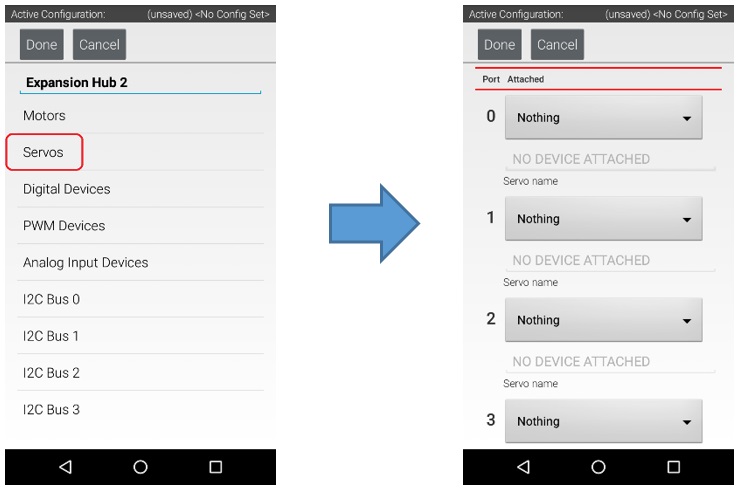
1. Touch on the word Servos on the screen to display the Servo Configuration screen.
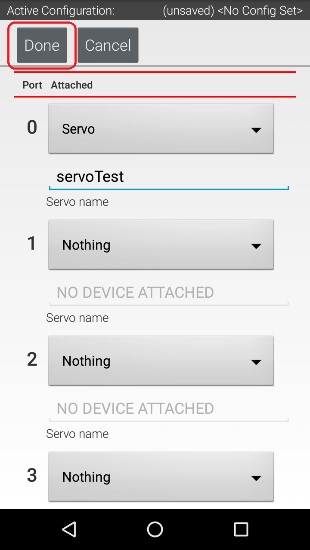
2. Use the dropdown control to select “Servo” as the servo type for port #0.

3. Use the touch pad to specify the name of the servo (“servoTest” for this example) for port #0.

4. Press the Done button to complete the servo configuration. The app should return to the previous screen.