Using Sensors AS
Color-Distance Sensor
A sensor is a device that lets the Robot Controller get information about its environment. In this example, you will use a REV Robotics Color-Distance sensor to display range (distance from an object) info to the driver station.
The Color-Range sensor uses reflected light to determine the distance from the sensor to the target object. It can be used to measure close distances (up 5” or more) with reasonable accuracy. Note that at the time this document was most recently edited, the REV Color-Range sensor saturates around 2” (5cm). This means that for distances less than or equal to 2”, the sensor returns a measured distance equal to 2” or so.
Modify your op mode to add a telemetry statement that will send the distance information (in centimeters) to the Driver Station.
telemetry.addData("Servo Position", servoTest.getPosition());
telemetry.addData("Target Power", tgtPower);
telemetry.addData("Motor Power", motorTest.getPower());
telemetry.addData("Distance (cm)", sensorColorRange.getDistance(DistanceUnit.CM));
telemetry.addData("Status", "Running");
telemetry.update();
After you have modified your op mode, build and install the updated Robot Controller app, then run the op mode to verify that it now displays distance on your Driver Station. Note that if the distance reads “NaN” (short for “Not a Number”) it probably means that your sensor is too far from the target (zero reflection). Also note that the sensor saturates at around 5 cm.
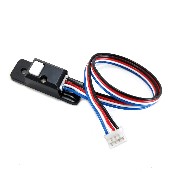
Touch Sensor
The REV Robotics Touch Sensor can be connected to a digital port on the Control Hub or Expansion Hub. The Touch Sensor is HIGH (returns TRUE) when it is not pressed. It is pulled LOW (returns FALSE) when it is pressed.
The Control Hub or Expansion Hub digital ports contain two digital pins per port. When you use a 4-wire JST cable to connect a REV Robotics Touch sensor to a Control Hub or Expansion Hub digital port, the Touch Sensor is wired to the second of the two digital pins within the port. The first digital pin of the 4-wire cable remains disconnected.
For example, if you connect a Touch Sensor to the “0,1” digital port of the Control Hub or Expansion Hub, the Touch Sensor will be connected to the second pin (labeled “1”) of the port. The first pin (labeled “0”) will stay disconnected.
Modify the code in your op mode that occurs before the waitForStart command to set the digital channel for input mode.
// set digital channel to input mode.
digitalTouch.setMode(DigitalChannel.Mode.INPUT);

telemetry.addData("Status", "Initialized");
telemetry.update();
// Wait for the game to start (driver presses PLAY)
waitForStart();
Also, modify the code in your while loop to add an if-else statement that checks the state of the digital input channel. If the channel is LOW (false), the touch sensor button is pressed and being pulled LOW to ground. Otherwise, the touch sensor button is not pressed.
// is button pressed?
if (digitalTouch.getState() == false) {
    // button is pressed.
    telemetry.addData("Button", "PRESSED");
} else {
    // button is not pressed.
    telemetry.addData("Button", "NOT PRESSED");
}

telemetry.addData("Status", "Running");
telemetry.update();
Build and install the updated Robot Controller app, then reinitialize and restart your op mode. The op mode should now display the state of the button (“PRESSED” or “NOT PRESSED”).