Color Locator (Discover)
Overview
Another way to use FTC’s new OpenCV vision tools is to operate a “Color Locator”. Namely, it can find a target color that you specify.
As with the Color Sensor tool, you can specify a Region of Interest (ROI). Only that zone of the camera’s view will be searched for the target color.
The “target color” is actually a range of numerical color values, for a better chance of finding the desired color.
OpenCV will form “Blobs” of that color. As described in the Concepts page here, a Blob is a contiguous cluster of similar-colored pixels.
Blobs often have a complex, irregular shape or contour, so they are represented here by a best-fit rectangle called “boxFit”.
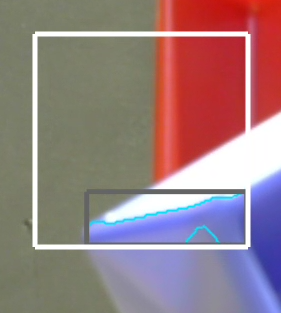
Zoomed Color Blob detection
The target color here is BLUE. The white rectangle is the Region of Interest (ROI), the teal jagged line is the Blob’s contour (fully inside the ROI), and the purple rectangle is the boxFit.
The software reports the size, position and orientation of each “boxFit”. That data can be evaluated by your OpMode for robot navigation and other actions.
The following sections describe how to do this, with a Sample OpMode.
Configuration
Skip this section if …
the active robot configuration already contains “Webcam 1”, or
using the built-in camera of an Android phone as Robot Controller.
Before starting the programming, REV Control Hub users should make a robot configuration that includes the USB webcam to be used as a color locator.
For now, use the default webcam name, “Webcam 1”. If a different name is preferred, edit the Sample OpMode to agree with the exact webcam name in the robot configuration.
Save and activate that configuration; its name should appear on the paired Driver Station screen.
Sample OpMode
Opening the Sample OpMode
To learn about opening the Sample OpMode, select and read the Blocks or Java section below:
On a laptop or desktop computer connected via Wi-Fi to the Robot Controller, open the Chrome browser. Go to the REV Control Hub’s address http://192.168.43.1:8080 (or http://192.168.49.1:8080 for Android RC phone) and click the Blocks tab.
Click
Create New OpMode, enter a new name such as “ColorLocator_Monica_v01”, and select the Sample OpModeConceptVisionColorLocator.At the top of the Blocks screen, you can change the type from “TeleOp” to “Autonomous”, since this Sample OpMode does not use gamepads.
If using the built-in camera of an RC phone, drag out the relevant Block from the left-side
VisionPortal.Buildertoolbox.Save the OpMode, time to try it!
Open your choice of OnBot Java or Android Studio.
In the
teamcodefolder, add/create a new OpMode with a name such as “ColorLocator_Javier_v01.java”, and select the Sample OpModeConceptVisionColorLocator.java.At about Line 63, you can change
@TeleOpto@Autonomous, since this Sample OpMode does not use gamepads.If using the built-in camera of an RC phone, follow the OpMode comments to specify that camera.
Click “Build”, time to try it!
Running the Sample OpMode
On the Driver Station, select the Autonomous OpMode that you just saved or built.
Turn off the automatic 30-second match timer (green slider). Aim the camera at a blue object.
Touch INIT only. The OpMode should give Telemetry showing the results of one or more Blobs:
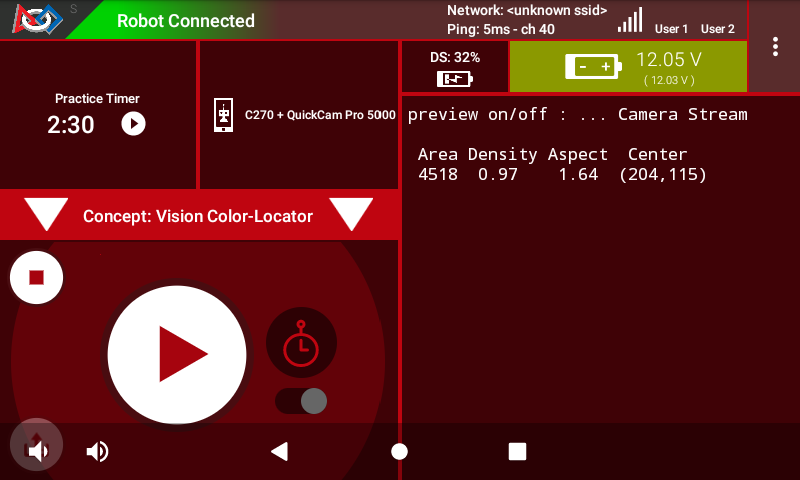
Basic Telemetry
In this example, the Region of Interest (ROI) contains only one Blob of the default target color BLUE.
Move the camera around, especially at BLUE objects, and watch the Telemetry area on the Driver Station screen. It may sometimes show more lines of Blob data, and sometimes show no Blob data at all.
It’s working! Your camera is working as a color locator. Think about how to use this in the FTC Robot Game.
Skip the next two sections, if you already know how to use FTC previews.
DS Preview
Before describing the telemetry data, this page offers two sections showing how to view the OpenCV results with previews. Previewing is essential for working with vision code.
On the Driver Station (DS), remain in INIT – don’t touch the Start button.
At the top right corner, touch the 3-dots menu, then Camera Stream. This
shows the camera’s view; tap the image to refresh it.
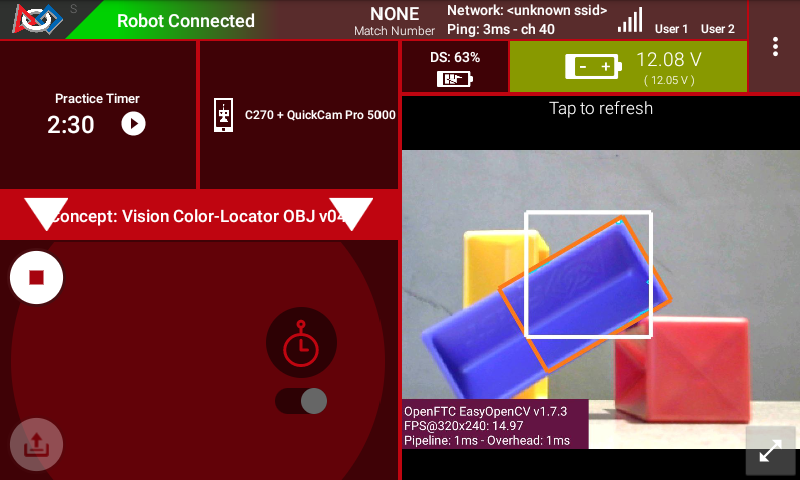
DS Camera Stream Preview
The default target color here is BLUE. The white rectangle is the Region of Interest (ROI), the teal (light blue) jagged line is the Blob’s contour (fully inside the ROI), and the orange rectangle is the boxFit.
For a BIG preview, touch the arrows at the bottom right corner.
Or, select Camera Stream again, to return to the previous screen and its Telemetry.
RC Preview
The Robot Controller (RC) device also makes a preview, called LiveView.
This is full video, and is shown automatically on the screen of an RC phone.
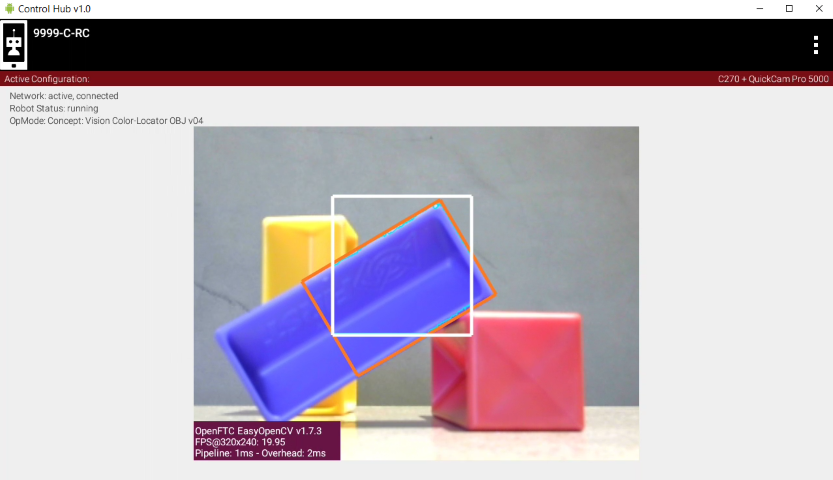
LiveView stream
The above preview is from a REV Control Hub.
It has no physical screen, so you must plug in an HDMI monitor or use open-source scrcpy (called “screen copy”) to see the preview on a laptop or computer that’s connected via Wi-Fi to the Control Hub.
Basic Telemetry Data
Let’s look closer at the DS telemetry:

Locator Telemetry
In this example, the Region of Interest (ROI) contains only one Blob of the default target color BLUE. You could probably move your camera to achieve the same result - with the help of previews.
The first column shows the Area, in pixels, of the Blob (contour, not boxFit). By default, the Sample OpMode uses a filter to show Blobs between 50 and 20,000 pixels. Also by default, the Sample uses a sort tool to display multiple Blobs in descending order of Area (largest is first).
The second column shows the Density of the Blob contour. From the Sample comments:
A blob’s density is an indication of how “full” the contour is. If you put a rubber band around the contour you would get the “Convex Hull” of the contour. The density is the ratio of Contour-area to Convex Hull-area.
The third column shows the Aspect Ratio of the boxFit, the best-fit rectangle around the contour:
A blob’s Aspect Ratio is the ratio of boxFit long side to short side. A perfect Square has an Aspect Ratio of 1. All others are > 1.
Tip
The boxFit is not required to stay inside the ROI. Also the boxFit may be tilted at some angle, namely not horizontal. This will be discussed more in a later page.
The fourth column shows the (X, Y) position of the Center of the boxFit rectangle. With the origin at the full image’s top left corner, X increases to the right and Y increases downward.
Blob Formation
So far these examples have shown a single Blob formed by OpenCV:
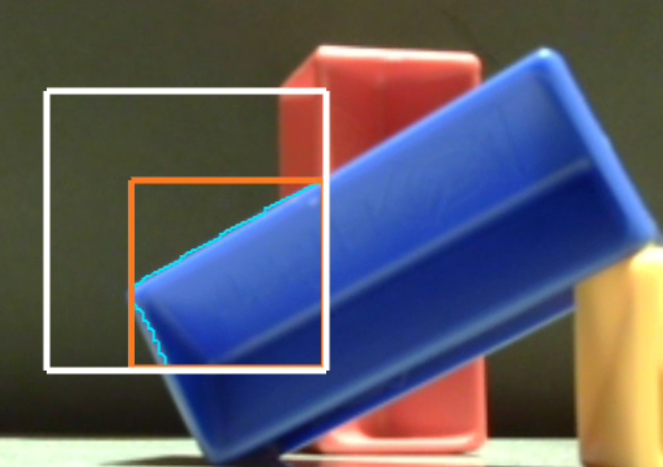
Single blob discovery
But OpenCV can form and return multiple Blobs in a single set of results:
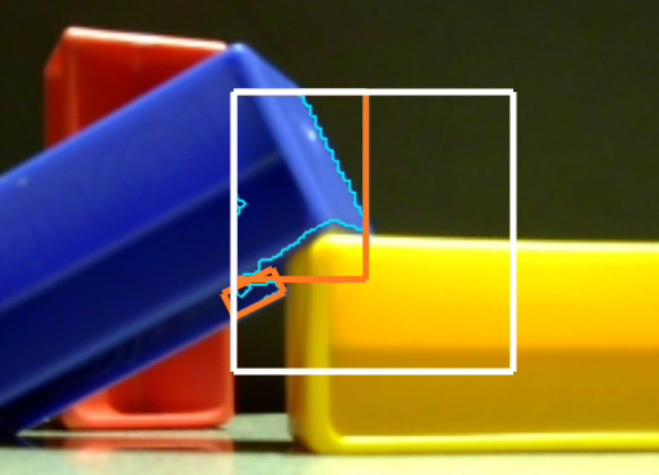
Two blob discovery
Without controls, OpenCV can easily form a high number of Blobs (at least 12 here):
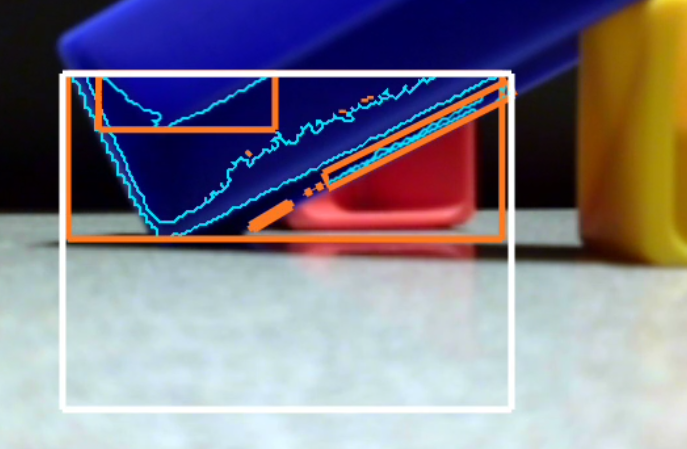
Multiple blob discovery
And as mentioned above, some of those Blobs might have a boxFit tilted at some angle:
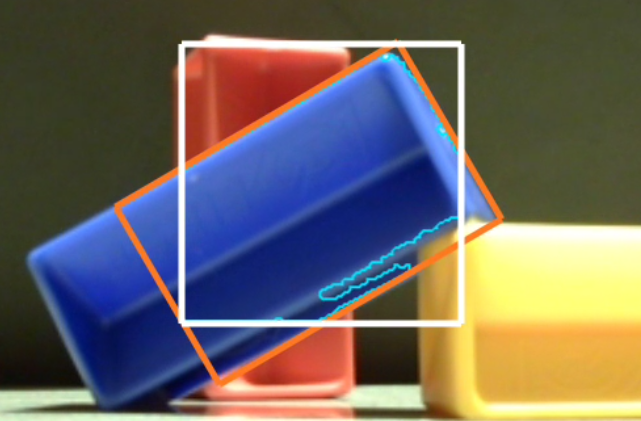
Tilted Boxfit
This tutorial’s next two pages show how to manage these scenarios by editing the OpMode’s default settings, and accessing more OpenCV features not covered in the Sample OpMode.
Using boxFit Data for Position
A team’s Autonomous code can evaluate boxFit data to navigate or guide the robot on the field.
Imagine your camera is on the robot, looking forward. Underneath the camera is your intake mechanism, perhaps a top grabber, sideways claw or spinner.
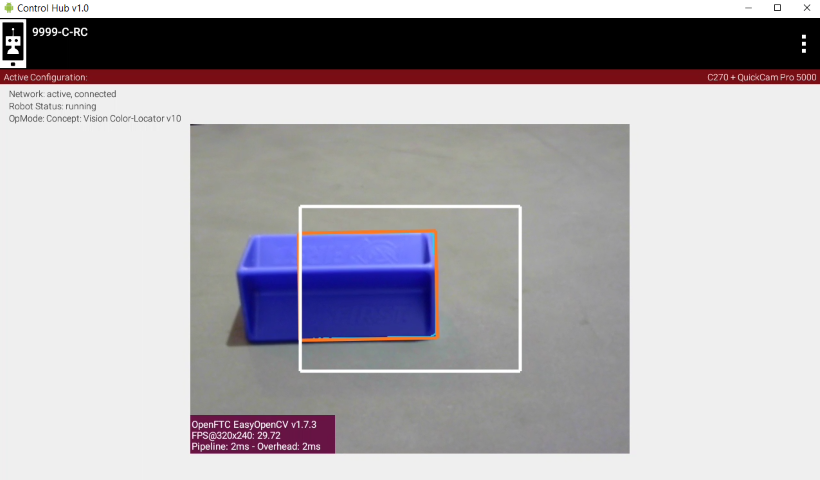
Game piece targeting
OpenCV will report the data for this orange boxFit. Could your code use this data to position the robot directly in front of the game piece, for a better chance to collect it?
How would you do it?
Using boxFit Data for Manipulation
For advanced teams: imagine your webcam is on a grabber arm, looking down into the Submersible (from INTO THE DEEP).
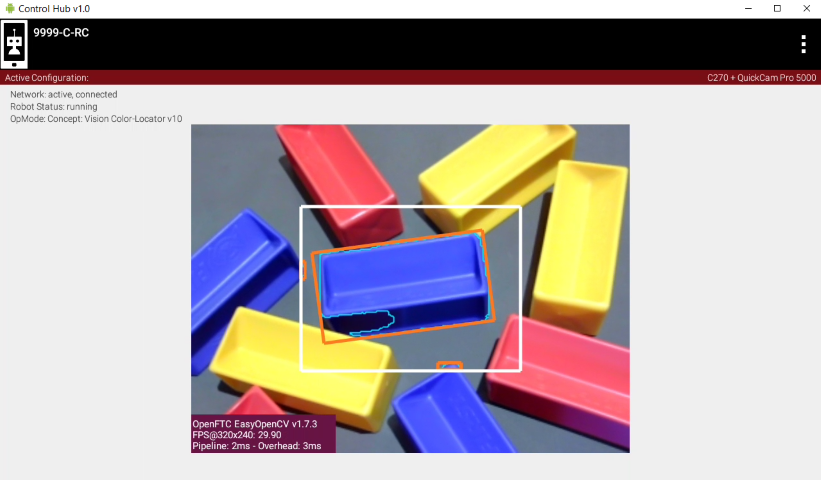
Targeting in clutter
Could the data from this boxFit (orange rectangle) help you grab only the Blue Sample?
Could this help in Autonomous and TeleOp?
More Documentation
This tutorial’s next page called Explore covers editing the OpMode’s existing default settings.
After that, the following page called Challenge shows how to access more OpenCV features not covered in the Sample OpMode.
Questions, comments and corrections to westsiderobotics@verizon.net