7. Creating a New Branch
Repeat Codespaces Local
7.1. What are branches and why do we need them?
Branches can be thought of as parallel versions of a project. This is useful for deveopment because it allows you to work on a feature or bug fix in an isolated environment without affecting the main project. Once you’ve made the changes you want to make, you can merge your branch back into the main branch to publish your changes. In the case of the FTC Docs, the main branch of your fork should always be a copy of the main branch of the main repository which serves as a reference point to create new branches from. After we are satisfied with the changes we’ve made in our branch, we will create a Pull Request to merge our changes back into the main branch of the Main Repository. After the Pull Request is approved, the changes will be merged into the main branch of the Main Repository and will be published to the FTC Docs website. After the changes are merged, we will use the process described in the Updating Fork
On the < > Code tab, we can see the Branch information below:
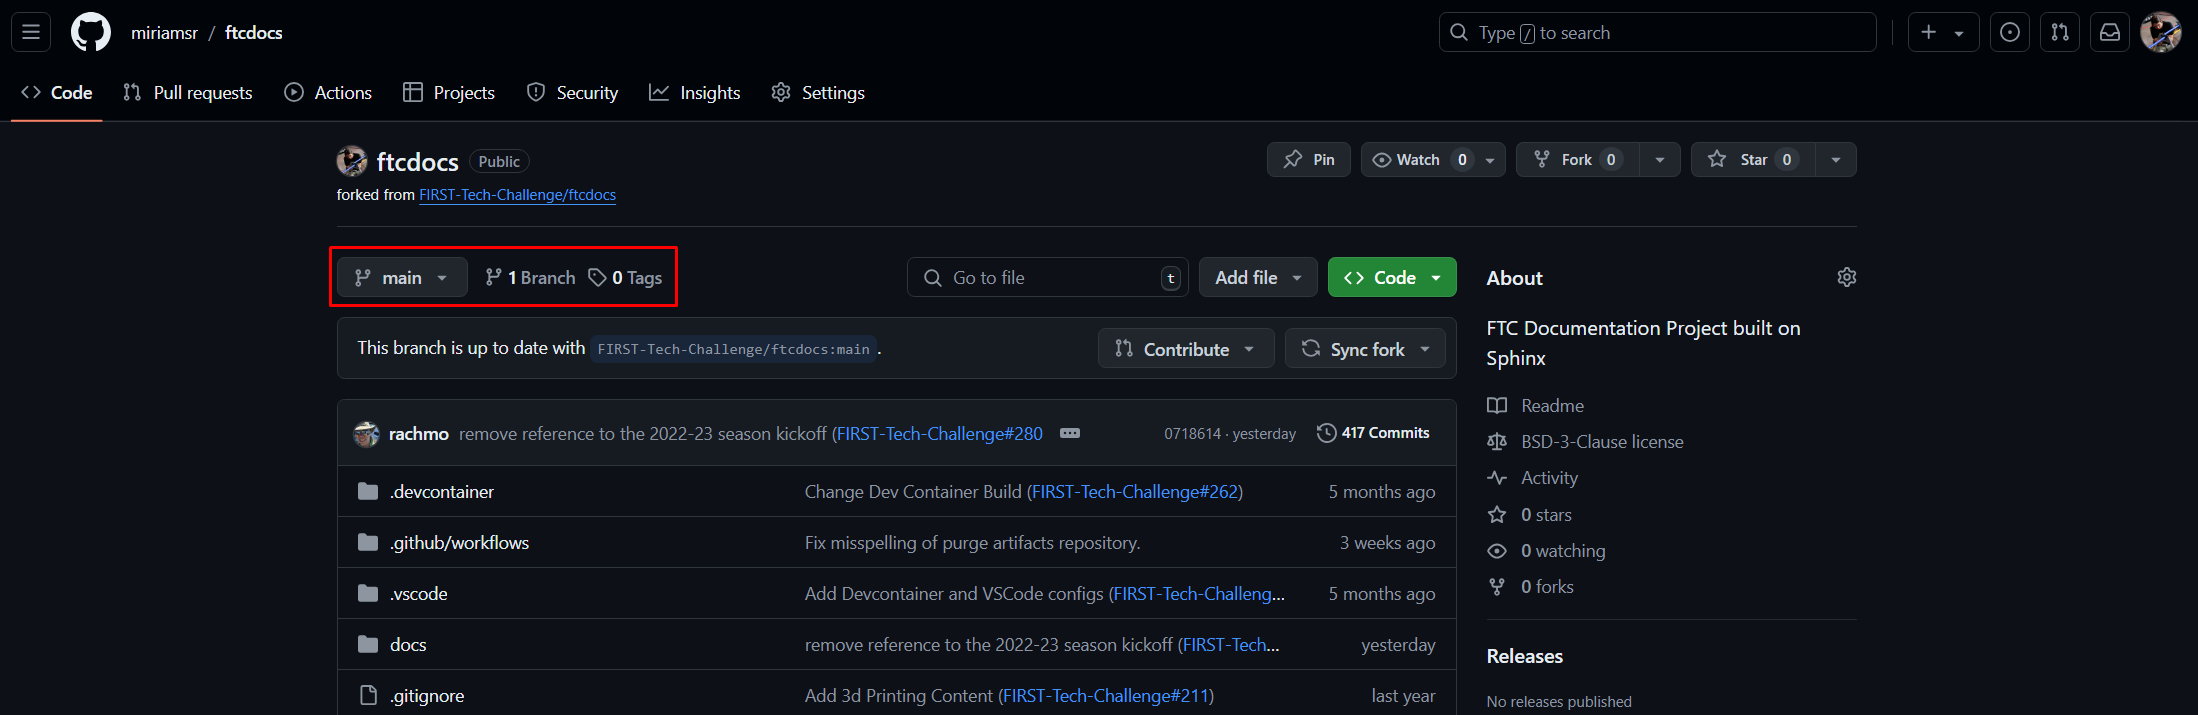
Figure 3: Example Fork branch information
Here we can see, circled in red, the Branch information for the repo. We can see that
the branch we’re currently viewing is the main branch, and there is only one
branch in the repo (there always has to be a main branch, so if there’s only
one branch then it’s the main branch).
If we click on the branch drop-down (that currently says, “main”) we will see a list of all the branches, and a search/create box. You can click on a branch name to switch the current view to a different branch, but if there are too many in the list you can just type in the name of the branch to filter the list. If you want to create a new branch, you can just type in the new name for the new branch and click the “Create branch <NAME> from ‘main’” item that will appear. This is the “quick branch” way of creating branches.
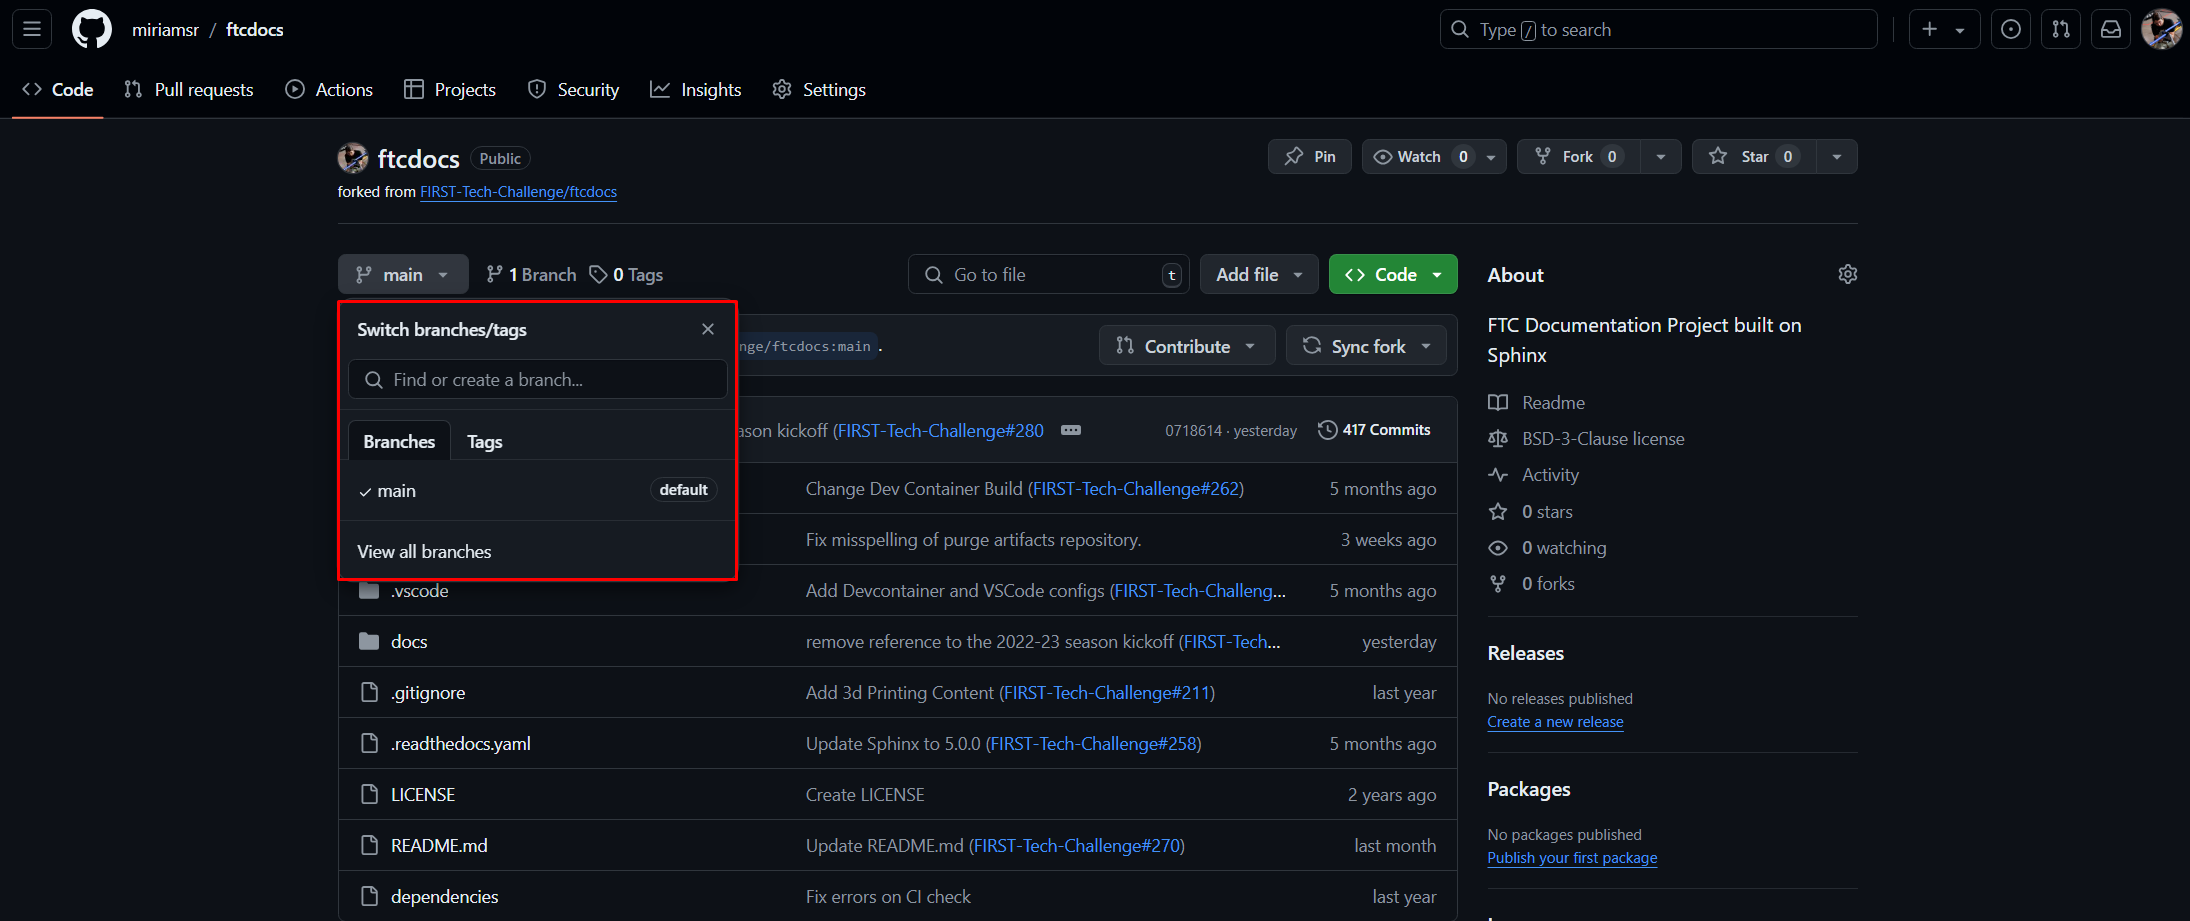
Figure 4: Example Fork branch selection
In order to make any changes to the content, we need to create ourselves a new
branch so that we have our own workspace in which to make changes. To create a
new branch duplicated from main, we need to ensure main is the
currently selected branch (if there’s only one branch then it’s got to be
main) and then we can type a new name in the box and click the “create”
selection that will appear. Let’s call this new branch demo. For real
work you should use a more descriptive name, like feature-<FEATURE_NAME>,
bugfix-<BUG_NUMBER>, or <YOUR_NAME>-<FEATURE_NAME>.
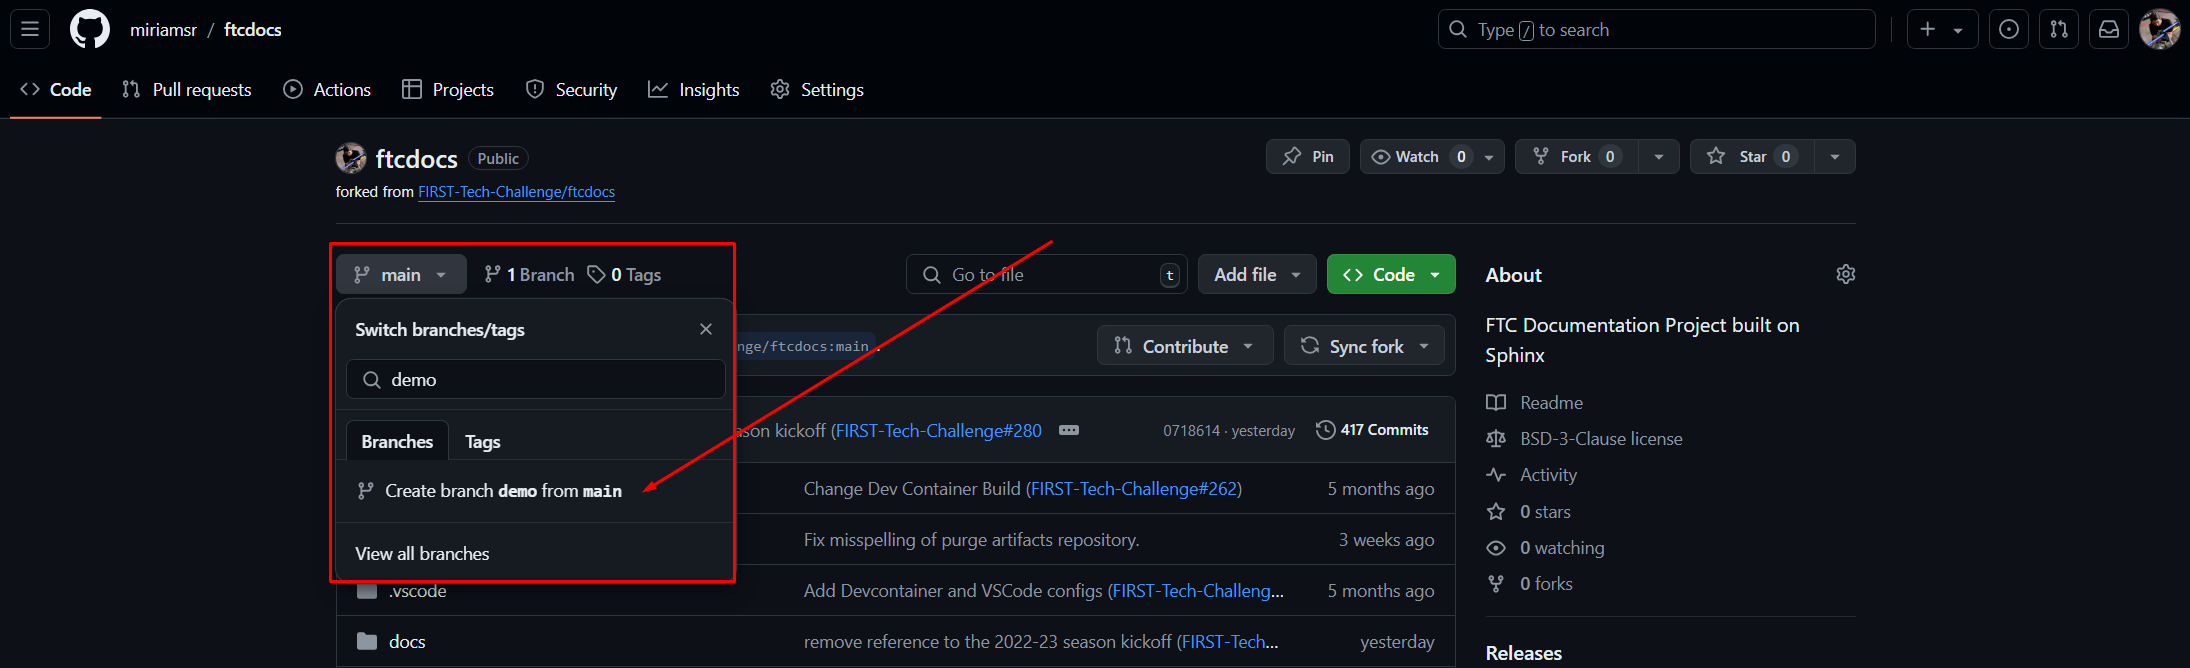
Figure 5: Example Fork create new branch
After clicking the “Create branch” button from Figure 5, your new branch should be created and the branch is automatically selected in the branch selection drop-down. You will also see the number of total branches increase by one. If you want to see all branches, you can click the “View all branches” link within the branch drop-down, or you can also click the “X Branches” link next to the branch selector. This will show you all of the current branches along with which one(s) are owned by you.
Figure 6 shows the “All Branches” view. This is yet another way of managing your branches, and may or may not turn into your favorite way of viewing and managing branches - everyone has their own personal opinion. From within this view you can create new branches by clicking the green “New Branch” button, rename YOUR branches by clicking on the pencil icon to the right of each branch, or delete YOUR branches by clicking the “Trash Can” icon to the right of each branch. You can only perform actions on YOUR own branches unless you’re an administrator (like me). You can also switch to another branch by clicking on the name of the branch.
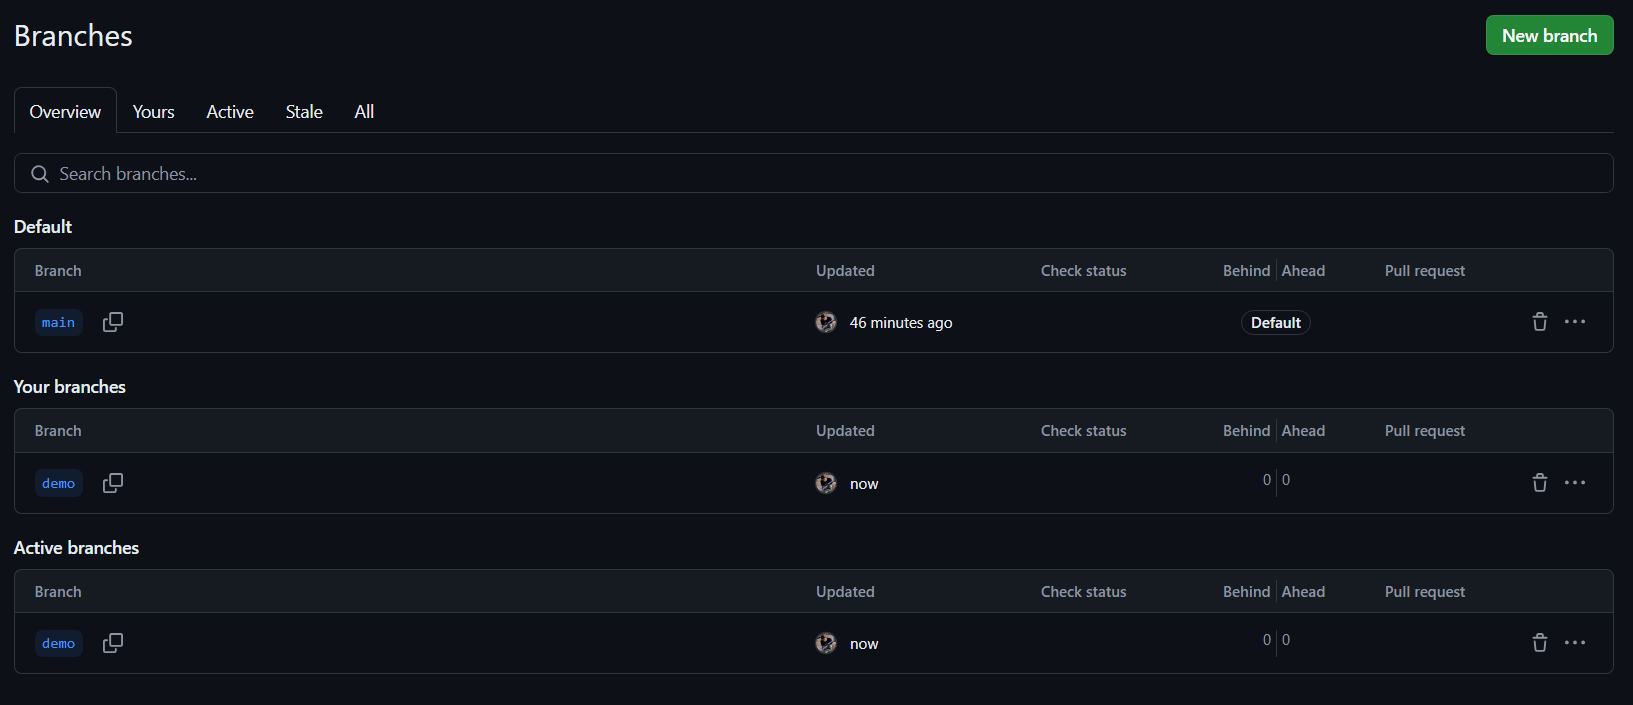
Figure 6: Example Fork view all branches
Congratulations, you’ve created a new branch!